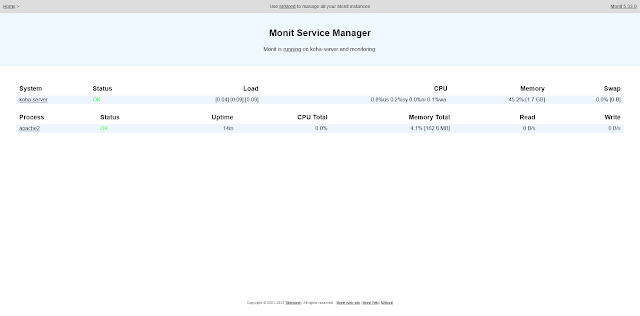
System administrators often face the challenge of ensuring critical services are always running. Monit is a lightweight yet powerful tool that simplifies this task. It monitors system processes, services, files, and directories, automatically restarting services when failures are detected.
In this post, we’ll explore how to install Monit on Debian/Ubuntu and set up monitoring services apache2, mysql and Memcached
Installing Monit on Debian/Ubuntu
Installing Monit is straightforward with the package manager. Follow these steps:
Update the Package List
sudo apt update
Install Monit
sudo apt install monit -y
Start and Enable Monit
Enable Monit to start automatically at boot and then start the service:
sudo systemctl enable monit
sudo systemctl start monit
Access Monit Web Interface (Optional)
To enable the web interface, edit the Monit configuration file:
sudo nano /etc/monit/monitrc
Uncomment and modify the following lines:
set httpd port 2812
allow admin:monit
Restart Monit:
sudo systemctl restart monit
1. Apache2 Configuration
Create the configuration file for apache2:
sudo nano /etc/monit/conf-available/apache2
Add the following content to monitor the Apache2 service:
check process apache2 with pidfile /run/apache2/apache2.pid
start program = "/bin/systemctl start apache2"
stop program = "/bin/systemctl stop apache2"
if failed host 127.0.0.1 port 80 protocol http
then restart
if 5 restarts within 5 cycles then timeout
Enable the configuration:
sudo ln -s /etc/monit/conf-available/apache2 /etc/monit/conf-enabled/
2. MySQL Configuration
Create the configuration file for mysql:
sudo nano /etc/monit/conf-available/mysql
Add the following content to monitor the MySQL service:
check process mysql with pidfile /run/mysqld/mysqld.pid
start program = "/bin/systemctl start mysql"
stop program = "/bin/systemctl stop mysql"
if failed host 127.0.0.1 port 3306 protocol mysql
then restart
if 5 restarts within 5 cycles then timeout
Enable the configuration:
sudo ln -s /etc/monit/conf-available/mysql /etc/monit/conf-enabled/
3. Memcached Configuration
Create the configuration file for memcached:
sudo nano /etc/monit/conf-available/memcached
Add the following content to monitor the Memcached service:
check process memcached with pidfile /run/memcached.pid
start program = "/bin/systemctl start memcached"
stop program = "/bin/systemctl stop memcached"
if failed host 127.0.0.1 port 11211
then restart
if 5 restarts within 5 cycles then timeout
Enable the configuration:
sudo ln -s /etc/monit/conf-available/memcached /etc/monit/conf-enabled/
4. Restart Monit and Verify
Restart the Monit service to apply the changes:
sudo systemctl restart monit
Check the status of the monitored services:
sudo monit summary
This will list the services being monitored, their statuses, and any actions Monit has taken (e.g., restarted a failed service).
By default, Monit checks the status of monitored services every 120 seconds, but this interval can easily be modified to suit your needs. If you require more frequent checks, such as every 15 seconds, you can adjust the polling interval in Monit’s configuration file. Simply edit the /etc/monit/monitrc file, change the of set daemon value from 120 to 15, and restart Monit with sudo systemctl restart monit. This ensures that Monit detects and resolves service issues more quickly, though keep in mind that more frequent checks may slightly increase CPU usage.


